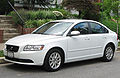
2009 Volvo S40 Owner's Manual
2009 Volvo S40 Manual
2009 Volvo S40 manual content summary:
- 2009 Volvo S40 | Owner's Manual - Page 1
VOLVO S40 Owner's manual Web Edition - 2009 Volvo S40 | Owner's Manual - Page 2
- 2009 Volvo S40 | Owner's Manual - Page 3
world-wide family of Volvo owners. We trust that you will enjoy many years of safe driving in your Volvo, an automobile designed with your safety and comfort in mind. We encourage you to familiarize yourself with the equipment descriptions and operating instructions in this manual. We also urge you - 2009 Volvo S40 | Owner's Manual - Page 4
overview...Instrument panel...Indicator and warning symbols...Symbols - instrument panel...Information display...12-volt sockets...Lighting panel...Left-side steering wheel lever...Trip computer...Cruise control (option)...Right-side steering wheel lever...Steering wheel adjustment, Hazard warning - 2009 Volvo S40 | Owner's Manual - Page 5
Contents 03 Climate General information...92 Air vents...94 Manual climate control...95 Electronic Climate Control (ECC) - option...98 Air distribution...101 04 Interior Front seats...Interior lighting...Storage compartments...Rear seat...Trunk ...104 107 109 113 115 05 Locks and alarm Remote - 2009 Volvo S40 | Owner's Manual - Page 6
Information System (BLIS)- option...Park assist (Option/accessory)...136 140 143 144 07 Wheels and tires General information...Tire inflation...Inflation pressure-U.S. models ...Inflation pressure-Canadian models ...Tire designations...Glossary of tire terminology...Vehicle loading...Uniform tire - 2009 Volvo S40 | Owner's Manual - Page 7
09 Maintenance and servicing Volvo maintenance...Maintaining your car...Hood...Engine compartment...Engine oil...Fluids Specifications Label information...Dimensions and weights...Fuel, oils, and fluids...Engine oil...Engine specifications...Electrical system...Three-way catalytic converter...Volvo - 2009 Volvo S40 | Owner's Manual - Page 8
Contents 12 Index Index...276 12 8 - 2009 Volvo S40 | Owner's Manual - Page 9
Contents 9 - 2009 Volvo S40 | Owner's Manual - Page 10
and move the selector from Park (P). Indicator Lamp ("Check Engine" light) may indicate a fault. NOTE • About this manual • Before you operate your vehicle for the first time, please familiarize yourself with the new-engine oil consumption information, see page 216. You should also be familiar - 2009 Volvo S40 | Owner's Manual - Page 11
Introduction General information WARNING If your vehicle is involved in an accident, unseen damage may affect its driveability and safety. WARNING CALIFORNIA proposition 65 Engine exhaust, some of its constituents, and certain vehicle components contain or emit chemicals known to the state of - 2009 Volvo S40 | Owner's Manual - Page 12
air pressure in your tires. Tests have shown decreased fuel economy with improperly inflated tires. • Follow the recommended maintenance schedule in your Warranty and Service Records Information booklet. • Drive at a constant speed whenever possible. • See a trained and qualified Volvo service - 2009 Volvo S40 | Owner's Manual - Page 13
booklet for more warranty information. Volvo assumes no responsibility for death, injury, or expenses that may result from the installation of nongenuine accessories. cellular telephone use by a driver while the vehicle is moving. • We strongly recommend that Volvo owners install only genuine - 2009 Volvo S40 | Owner's Manual - Page 14
protection airbags...Volvo Inflatable Curtain (VIC)...Whiplash Protection System...Crash mode...Child safety...Child restraint systems...Infant seats...Convertible seats...Booster cushions...ISOFIX lower anchors...Top tether anchors...Child restraint registration and recalls - 2009 Volvo S40 | Owner's Manual - Page 15
SAFETY 01 - 2009 Volvo S40 | Owner's Manual - Page 16
other information about motor vehicle safety from: http://www.safercar.gov Volvo strongly recommends that if your vehicle is covered under a service campaign, safety or emission recall or similar action, it should be completed as soon as possible. Please check with your local retailer or Volvo Cars - 2009 Volvo S40 | Owner's Manual - Page 17
01 Reporting safety defects in Canada If you believe your vehicle has a defect that could cause a crash or could cause injury or death, you should immediately inform Transport Canada in addition to notifying Volvo Cars of Canada Corp. To contact Transport Canada, call (800) 333-0510, or (613) 993 - 2009 Volvo S40 | Owner's Manual - Page 18
after being unbuckled. If necessary, guide the belt back into the retractor slot. WARNING Never use a seat belt for more than should be properly restrained, using an infant, car, or booster seat determined by age, weight and height. Volvo also believes no child should check that the seat belt 18 - 2009 Volvo S40 | Owner's Manual - Page 19
by a trained and qualified Volvo service technician only. Any device used to induce slack into the Child seats Please refer to page 37 for information on securing child seats with the seat belts. light in ceiling console The seat belt reminder consists of an audible signal, an indicator light - 2009 Volvo S40 | Owner's Manual - Page 20
. Seat belt maintenance Check periodically that the seat belts are in good condition. Use water and a mild detergent for cleaning. Check seat belt mechanism by pressing the READ button. The message in the information display can always be accessed, even if it has been erased, by pressing - 2009 Volvo S40 | Owner's Manual - Page 21
deployment which could result in personal injury. Have the vehicle towed to a trained and qualified Volvo service technician for repairs. Automatic transmission Before attempting to tow the vehicle, use the following procedure to override the shiftlock system to move the gear selector to the neutral - 2009 Volvo S40 | Owner's Manual - Page 22
Location of the passenger's side front airbag As the movement of the seats' occupants compresses the airbags, some of the gas is expelled at a controlled rate to provide better cushioning. Both seat belt pretensioners also deploy, minimizing seat belt slack. The entire process, including inflation - 2009 Volvo S40 | Owner's Manual - Page 23
damage to the bodywork does not reliably indicate if the airbags should have deployed or not. Should you have questions about any component in the SRS system, please contact a trained and qualified Volvo service technician or Volvo Customer Support: In the USA Volvo Cars of North America, LLC 23 - 2009 Volvo S40 | Owner's Manual - Page 24
us In Canada Volvo Cars of Canada Corp. National Customer Service 175 Gordon Baker Road North York, Ontario M2H 2N7 1-800-663-8255 www.volvocanada.com WARNING • Do not use child safety seats front passenger's door opening 1 See also the Occupant Weight Sensor information on page 26. 24 G032243 - 2009 Volvo S40 | Owner's Manual - Page 25
not on the dash, seat or out of the window. • No objects or accessory equipment, e.g. dashboard covers, may be placed on, attached to, or installed near only be done by a trained and qualified Volvo service technician. Failure to follow these instructions can result in injury to the vehicle - 2009 Volvo S40 | Owner's Manual - Page 26
the manufacturer's instructions, Occupant Weight Sensor (OWS) indicator light • The OWS indicator light will stay on • The SRS warning light (see page 21) will come on and stay on The message PASS. AIRBAG OFF SERVICE URGENT will be displayed in the information display. Volvo recommends that ALL - 2009 Volvo S40 | Owner's Manual - Page 27
If a person of adult size is sitting in the front passenger Volvo service technician. The front passenger's seat should not be modified in any way. This could reduce pressure on the seat cushion, which might interfere with the OWS system's function. OWS indicator light lights up OWS indicator light - 2009 Volvo S40 | Owner's Manual - Page 28
Volvo Cars of Canada Corp. National Customer Service 175 Gordon Baker Road North York, Ontario M2H 2N7 1-800-663-8255 WARNING WARNING Keep the following points in mind with respect to the OWS system. Failure to follow these instructions pressure on use of the Automatic - 2009 Volvo S40 | Owner's Manual - Page 29
be done only by a trained and qualified Volvo service technician. In order for the SIPS airbag to provide its best protection, both front seat occupants should sit in an upright position with the seat belt properly fastened. Failure to follow these instructions can result in injury to the occupants - 2009 Volvo S40 | Owner's Manual - Page 30
of the roof liners, stretching from the center of both front side windows to the rear edge of the rear side door windows. It is designed to system. This should be done only by a trained and qualified Volvo service technician. Never hang heavy items from the ceiling handles. This could impede deployment - 2009 Volvo S40 | Owner's Manual - Page 31
belt properly fastened; adults using the seat belt and children using the proper child restraint system. Only adults should sit in the front seats. Children must never be allowed in the front passenger's seat, see page 36 for guidelines. Failure to follow these instructions can result in injury to - 2009 Volvo S40 | Owner's Manual - Page 32
are designed to change position slightly to allow the backrest/head restraint to help support the occupant WHIPS system is designed to function in certain collisions from the rear, depending on the crash severity, angle and Volvo service technician, even if the seats appear to be undamaged. • • - 2009 Volvo S40 | Owner's Manual - Page 33
01 Safety Whiplash Protection System Certain components in the WHIPS system may need to be replaced. 01 • Do not attempt to service any component in the WHIPS system yourself. WARNING G020126 • • Boxes, suitcases, etc. wedged behind the front seats could impede the function of the WHIPS system. - 2009 Volvo S40 | Owner's Manual - Page 34
qualified Volvo service technician. After CRASH MODE SEE MANUAL has been displayed, if you detect the odor of fuel vapor, or see any signs of fuel minor and there is no fuel leakage, you may attempt to start the vehicle. To do so: 1. Remove the ignition key or optional keyless drive start control, - 2009 Volvo S40 | Owner's Manual - Page 35
page 42). Legislation in your state or province may mandate the use of a child seat or cushion in combination with the seat belt, depending on the child's age and/or size. Please check local regulations. A specially designed and tested booster cushion (not available in Canada) can be obtained from - 2009 Volvo S40 | Owner's Manual - Page 36
for over seventy-five years, and we'll continue to do our part. But we need your help. Please remember to put your children in the back seat, and buckle them up. • Drive safely! Volvo has some very specific recommendations: • Always wear your seat belt. • Airbags are a SUPPLEMENTAL safety device - 2009 Volvo S40 | Owner's Manual - Page 37
manufacturer's instructions for detailed information on securing the restraint. 01 WARNING • G026503 When not in use, keep the part of its total weight and its neck is still very weak. Volvo recommends that children up to age 4 travel, properly restrained, facing rearward. In addition, Volvo - 2009 Volvo S40 | Owner's Manual - Page 38
the infant seat WARNING A child seat should never be used in the front passenger seat of any vehicle with a information on securing a child restraint using ISOFIX lower anchors and/or top tether anchorages. 2. Attach the seat belt to the infant seat according to the manufacturer's instructions - 2009 Volvo S40 | Owner's Manual - Page 39
the shoulder section of the seat belt out as far as possible to activate the belt's automatic locking function. Ensure that the seat is securely in place WARNING NOTE The locking retractor will automatically release when the seat belt is unbuckled and allowed to retract fully. It should not be - 2009 Volvo S40 | Owner's Manual - Page 40
use a convertible seat that is suitable for the child's age and size. See the convertible seat manufacturer's recommendations. WARNING A small child's head represents a considerable part of its total weight and its neck is still very weak. Volvo for information on securing a child restraint using - 2009 Volvo S40 | Owner's Manual - Page 41
Convertible seats NOTE The locking retractor will automatically release when the seat belt is unbuckled and allowed seat belt 2. Attach the seat belt to the convertible seat according to the manufacturer's instructions. 3. Fasten the seat belt by inserting the latch plate into the buckle (lock) - 2009 Volvo S40 | Owner's Manual - Page 42
the seat belt to or around the cushion according to the manufacturer's instructions. 3. Fasten the seat belt by inserting the latch plate into the fasten the seat belt WARNING • WARNING A child seat should never be used in the front passenger seat of any vehicle with a front passenger airbag - 2009 Volvo S40 | Owner's Manual - Page 43
point (see page 45) and secure the restraint with the vehicle's center seat belt (see page 37). Always follow your child seat manufacturer's installation instructions, and use both ISOFIX lower anchors and top tethers whenever possible. The ISOFIX lower child restraint anchors are only intended for - 2009 Volvo S40 | Owner's Manual - Page 44
01 Safety 01 ISOFIX lower anchors WARNING Be sure to fasten the attachment correctly to the anchor (see the illustration). If the attachment is not correctly fastened, the child restraint may not be properly secured in the event of a collision. 44 - 2009 Volvo S40 | Owner's Manual - Page 45
information designed to withstand only those loads imposed by correctly fitted child restraints. Under no circumstances are they to be used Using the top tether anchorages 1. Place the child restraint on the rear seat. 2. Release the child restraint manufacturer's instructions. Tension the top tether - 2009 Volvo S40 | Owner's Manual - Page 46
to fill out and return the registration card that comes with new child restraints. Child restraint recall information is readily available in both the U.S. and Canada. For recall information in the U.S., call the U.S. Government's Auto Safety Hotline at 1-800-424-9393. In Canada, visit Transport - 2009 Volvo S40 | Owner's Manual - Page 47
01 Safety 01 47 - 2009 Volvo S40 | Owner's Manual - Page 48
overview...Instrument panel...Indicator and warning symbols...Symbols - instrument panel...Information display...12-volt sockets...Lighting panel...Left-side steering wheel lever...Trip computer...Cruise control (option)...Right-side steering wheel lever...Steering wheel adjustment, Hazard warning - 2009 Volvo S40 | Owner's Manual - Page 49
INSTRUMENTS AND CONTROLS 02 - 2009 Volvo S40 | Owner's Manual - Page 50
02 Instruments and controls Instrument overview 02 50 G019488 - 2009 Volvo S40 | Owner's Manual - Page 51
adjustment Hood opener Controls in front doors (see page 52) Left steering wheel lever Passenger's side reading light Lighting panel, fuel filler use Not is use Courtesy lighting switch Driver's side reading light Parking brake 12-volt socket Position for optional equipment Position for optional - 2009 Volvo S40 | Owner's Manual - Page 52
02 Instruments and controls Instrument overview Control panel in driver's door 02 Lockout switch for rear windows Power windows Door mirror button, driver's side Door mirror adjustment control Door mirror button, passenger's side 52 G017435 - 2009 Volvo S40 | Owner's Manual - Page 53
the vehicle down. The engine management system will automatically prevent exces- sively high engines speeds. This will be noticeable as a pronounced unevenness in engine speed. Indicator and warning symbols Fuel gauge, see page 267 for fuel tank volume. When a warning light in the gauge comes on - 2009 Volvo S40 | Owner's Manual - Page 54
controls Instrument panel odometer, trip odometers, optional rain sensor, and cruise control. 02 Trip odometer reset button - The trip odometers are used to measure short distances. Press the button briefly to switch between the odometer for the car's total mileage and the two trip odometers, T1 - 2009 Volvo S40 | Owner's Manual - Page 55
been released. CHECK ENGINE Symbols in the center of the instrument panel If the red warning symbol lights up: 1. Stop the car as soon as possible in a suitable location. 2. Read the message in the information display. 3. Follow the instructions provided, or contact a trained and qualified Volvo - 2009 Volvo S40 | Owner's Manual - Page 56
controls Indicator and warning symbols This symbol may also light up in combination with other indicator or warning symbols. 02 NOTE The car can still be driven after the information symbol has come on. The car can be driven for 1-2 weeks after service-related information has been displayed. 56 - 2009 Volvo S40 | Owner's Manual - Page 57
to a trained and qualified Volvo service technician for inspection, see page 153 for additional information. G026439 6. Fuel level warning light When this light comes on, the vehicle should be refueled as soon as possible. 1. Malfunction indicator light CHECK ENGINE As you drive, a computer - 2009 Volvo S40 | Owner's Manual - Page 58
information. 4. Oil pressure warning light1 If the light comes on while driving, the car, stop the engine immediately, and check the engine oil level. If the oil level is normal and the light stays on after restart, have the car towed to the nearest trained and qualified Volvo service technician - 2009 Volvo S40 | Owner's Manual - Page 59
the doors, the hood or the trunk are open or ajar. WARNING If the fluid level is below the MIN mark in the reservoir or if a Brake failure - Service urgent message is displayed in the information display: DO NOT DRIVE. Have the car towed to a trained and qualified Volvo service technician and have - 2009 Volvo S40 | Owner's Manual - Page 60
to a trained and qualified Volvo service technician for inspection immediately. Refer to your owner's manual. For additional information, please contact your Volvo retailer. BOOK TIME FOR SERVICE TIME FOR REGULAR MAINTENANCE G019617 When an indicator or warning light in the instrument panel comes - 2009 Volvo S40 | Owner's Manual - Page 61
hours since the service reminder was reset at the most recent regularly scheduled service. Stop as soon as possible and switch off the engine, check the oil level and top up if necessary, see page 216. 02 REMINDER CHECK OIL LEVEL A This is part of the message. Additional information will also be - 2009 Volvo S40 | Owner's Manual - Page 62
to the left of the 12-volt socket can be used for Volvo-installed optional or auxiliary equipment. 12-volt socket (rear seat) G026349 12-volt socket, auxiliary equipment The 12-volt socket can be used to plug in certain accessories such as cellular telephones, etc. The maximum current is 10 - 2009 Volvo S40 | Owner's Manual - Page 63
Active Bi-Xenon Lights (ABL)-option 02 Headlights 1. Turn the ignition key to position II. 2. The low beam headlights (daytime running lights) illuminate automatically, except when the light switch (1) is in the parking light position1. G026415 Pos. Lighting Daytime running lights off. High beam - 2009 Volvo S40 | Owner's Manual - Page 64
to less than 500 ft. (150 meters). The brake lights come on automatically when the brakes are applied. Fog lights Front fog lights (option) The front fog lights can be used in combination with either the headlights or the parking lights. 1. Turn the ignition key to position II. G020789 Instrument - 2009 Volvo S40 | Owner's Manual - Page 65
and controls Lighting panel Unlocking the fuel filler door With the ignition switched off, press button (4) to unlock the fuel filler door. Please note that the fuel filler door will remain unlocked until the car begins to move forward. An audible click will be heard when the fuel filler door - 2009 Volvo S40 | Owner's Manual - Page 66
position. Home safe lighting When you leave your car at night, you can make use of the home safe lighting function to illuminate the headlights and parking lights will illuminate and remain on for 301, 60 or 90 seconds. The time interval can be changed according to your NOTE • • This automatic - 2009 Volvo S40 | Owner's Manual - Page 67
02 Instruments and controls Left-side steering wheel lever preferences by using the Personal Settings function, see page 83 for more information. 02 67 - 2009 Volvo S40 | Owner's Manual - Page 68
. G029052 If a warning message is shown in the information display while you are using the trip computer: 1. Acknowledge the message by pressing reset, by pressing RESET (button 3). When the engine is switched off, information on fuel consumption is stored and remains in system memory until RESET - 2009 Volvo S40 | Owner's Manual - Page 69
instantaneous conversion of the car's current speed from km/h to mph. 02 NOTE Trip computer readings may vary slightly depending on the circumference of the tires on the car, tire inflation, or driving style. 69 - 2009 Volvo S40 | Owner's Manual - Page 70
automatically return to the previously set speed when the accelerator pedal is released. G020141 G031667 Temporarily disengaging the cruise control • Press 0 to temporarily disengage cruise control. The cruise control buttons are located on the left side of the steering wheel hub. Use - 2009 Volvo S40 | Owner's Manual - Page 71
and controls Cruise control (option) • During wheel spin or wheel lock-up. • If the vehicle's speed is increased by using the accelerator pedal for (N). WARNING Cruise control should not be used in heavy traffic or when driving on wet or slippery roads. Cruise control may not maintain set speed on - 2009 Volvo S40 | Owner's Manual - Page 72
for information on the light switch positions: Continuous wiper function The wipers operate at "normal" speed. High speed wiper function. Windshield/headlight washers Rain sensor (option) - on/of, see page 72 Thumb wheel A-Windshield washers Pull the lever toward the steering wheel and release it - 2009 Volvo S40 | Owner's Manual - Page 73
option) 3. Press button B (see page 72). The rain sensor symbol will appear in the lower display. C - Thumb wheel The thumb wheel is used optional rain sensor's sensitivity when the this function is activated. 02 Manual be deactivated when washing the car in an automatic car wash, etc. If the rain - 2009 Volvo S40 | Owner's Manual - Page 74
02 Check that the steering wheel is locked in the new position. NOTE • • WARNING Never adjust the steering wheel while driving. Regulations regarding the use of the hazard warning flasher may vary, depending on where you live. The hazard warning flashers will be activated automatically if - 2009 Volvo S40 | Owner's Manual - Page 75
, the parking brake lever must be pulled more firmly. 5. When parking a vehicle always put the gear selector in first gear (for manual transmission) or P (for automatic transmission). 02 Parking on a hill • If the vehicle is pointing uphill, turn the front wheels so that they point away from the - 2009 Volvo S40 | Owner's Manual - Page 76
Lightly press down the front edge of any of the buttons (A or B) to the first detent ("stop") to open a window to the position of your choice. to close a window to the position of your choice. • Pull the front part of any of the buttons (A or B) up as far as possible and release to automatically - 2009 Volvo S40 | Owner's Manual - Page 77
02 Instruments and controls Power windows buttons on the rear door armrests or with the buttons on the driver's door armrest. If the light in the switch is ON: The rear door windows can only be raised or lowered with the buttons on the driver's door. Power window controls - - 2009 Volvo S40 | Owner's Manual - Page 78
in a large, open area, away from traffic. 2. Using a pen or similar object, hold the button (1) depressed for at least 6 seconds. "C" will be displayed. Auto-dim function (option) An optional integrated sensor reacts to headlights from following traffic and automatically reduces glare. 78 G031045 - 2009 Volvo S40 | Owner's Manual - Page 79
mirror: 1. Press the R switch (a light in the switch will go on) to activate the adjustment control. Use this control to adjust the passenger's door that door is opened within 2 minutes, the optional power driver's seat and side door mirrors will automatically move to the position that they were in - 2009 Volvo S40 | Owner's Manual - Page 80
Release them after approximately one second. The mirrors automatically fold automatically when the vehicle is unlocked if they were folded in using the buttons on the driver's door control panel. Blind Spot Information System (BLIS) option The Blind Spot Information System (BLIS) is an information - 2009 Volvo S40 | Owner's Manual - Page 81
far forward as possible (to position 4) and release it to automatically close the moonroof. 02 Manual open/close G029222 G007503 Open: Pull the switch back II or the engine running). The moonroof can be opened in two ways: Tilt position Sliding moonroof Auto open Manual open Manual close Auto - 2009 Volvo S40 | Owner's Manual - Page 82
The optional moonroof features a sliding visor. The visor slides open automatically when the moonroof is opened, and must be closed manually. • • • Never open or close the moonroof if it is obstructed in any way. Never allow a child to operate the moonroof. Never extend any object or body part - 2009 Volvo S40 | Owner's Manual - Page 83
be locked automatically. The alternatives On/Off are available. Press EXIT (C). Display Menu button Exit button Enter button Menu navigation controls Available settings Clock adjust To set the time: 1. Use the number keys or the up/down arrow keys on the navigation control (E) to change the hour - 2009 Volvo S40 | Owner's Manual - Page 84
of 30/60/90 seconds may be selected, see page 66 for information on using this function. Keyless locking and unlocking (option as available) The following alternatives can be selected for locking and unlocking the doors and trunk: NOTE The ignition key must be in position I or higher (see page - 2009 Volvo S40 | Owner's Manual - Page 85
front doors - both front doors are unlocked together. • One front door - either of the front doors can be unlocked separately2. 02 Reset to factory settings Use this alternative to return to the default climate system settings. 2 Factory default. 85 - 2009 Volvo S40 | Owner's Manual - Page 86
way to replace up to three hand-held radio-frequency (RF) transmitters used to activate devices such as gate operators, garage door openers, entry door locks, security systems, even home lighting. Additional HomeLink information can be found on the Internet at www.homelink.com. 1. Position the - 2009 Volvo S40 | Owner's Manual - Page 87
the HomeLink indicator light does not change to a rapidly blinking light after performing these steps, contact HomeLink at www.homelink.com. found where the hanging antenna wire is attached to the motor-head unit. 5. Firmly press and release the "learn" or "smart" button. (The name and color of the - 2009 Volvo S40 | Owner's Manual - Page 88
operation. NOTE The transmitter has been tested and complies with FCC and IC rules. Changes or modifications not expressly approved by the using a HomeLink button previously trained, follow these steps: 1. Press and hold the desired HomeLink button. DO NOT release the button. 2. The indicator light - 2009 Volvo S40 | Owner's Manual - Page 89
02 Instruments and controls 02 89 - 2009 Volvo S40 | Owner's Manual - Page 90
General information...92 Air vents...94 Manual climate control...95 Electronic Climate Control (ECC) - option...98 Air distribution...101 90 G020906 - 2009 Volvo S40 | Owner's Manual - Page 91
CLIMATE 03 - 2009 Volvo S40 | Owner's Manual - Page 92
or misting Passenger compartment filter Replace the cabin air filter with a new one at the recommended intervals. Please refer to your Warranty and Service Records Information booklet, or consult a trained and qualified Volvo service technician for these intervals. The filter should be replaced - 2009 Volvo S40 | Owner's Manual - Page 93
information about how to make these settings, see the Personal settings section on page 83. closed. If you drive with the windows or moonroof open, it may be preferable to manually adjust the temperature and blower control (the LED in the AUTO switch should be off). Models equipped with ECC (option - 2009 Volvo S40 | Owner's Manual - Page 94
03 Climate Air vents Air vents in the dashboard 03 Open Closed Horizontal air flow Vertical air flow Direct the outer air vents toward the side windows to defrost. 94 G019942 - 2009 Volvo S40 | Owner's Manual - Page 95
and door mirror defrosters Temperature selector Manual climate system functions 1. Blower The If the knob is turned counterclockwise and the indicator light in the display goes out, the blower and OFF. G019515 2. Recirculation This function can be used to shut out exhaust fumes, smoke, etc from - 2009 Volvo S40 | Owner's Manual - Page 96
function can be switched off manually by pressing the button, • Air flows to the windows at high blower speed. • The defrost function switches off automatically after 12-20 minutes, depending on the outside temperature. • The LED in the defroster button lights up when this function is activated - 2009 Volvo S40 | Owner's Manual - Page 97
03 Climate Manual climate control 9. Temperature selector The knob with the thermometer symbol is used to select cooling or heating for both the driver's and passenger's sides of the car. 03 97 - 2009 Volvo S40 | Owner's Manual - Page 98
controls heating, air conditioning, blower speed, recirculation, and air distribution. If you select one or more manual functions, the remaining functions continue to be controlled automatically. All manual settings are switched off when AUTO is switched on. AUTO CLIMATE is shown in the display - 2009 Volvo S40 | Owner's Manual - Page 99
been selected. With manually selected airflow both warm and cool air can be selected. See also the table on page 99. 7 and 8. Heated front seats (option) Maximum heating: Press the button once - both LEDs light up. Reduced heating: Press the button a second time - one LED lights up. Seat heating - 2009 Volvo S40 | Owner's Manual - Page 100
option 's and passenger's sides can be set separately using the knob (with the thermometer in it). once. The LED for one side of the car will light up. Turn the knob to adjust the temperature. 2. switched off manually by pressing the button. • The defrost function switches off automatically after 12 - 2009 Volvo S40 | Owner's Manual - Page 101
the dashboard air vents. For sunny weather with cool ambient temperatures. Use: Defrost/de-fog the windshield and front side windows. Air distribution is also a certain amount of airflow to the dashboard air vents. Use: For comfortable conditions and good defrosting in cold weather. Medium to - 2009 Volvo S40 | Owner's Manual - Page 102
Front seats...Interior lighting...Storage compartments...Rear seat...Trunk ... 104 107 109 113 115 102 G020908 - 2009 Volvo S40 | Owner's Manual - Page 103
INTERIOR 04 - 2009 Volvo S40 | Owner's Manual - Page 104
Interior Front seats Manual Use this control to raise or lower the front edge of the seat cushion. Use this control to raise or lower the rear edge of the seat cushion. Turn this knob (option backrest as shown in the illustration. 4. Without releasing the catches, push the backrest forward. 5. Move - 2009 Volvo S40 | Owner's Manual - Page 105
Interior if the ignition key is in position I or II, or if the engine is running. Seat adjustment controls G020199 Emergency stop If the seat inadvertently seat memory, driver's seat only (option) Seat adjustment controls 1, 2, 3, and 4 on the side of the seat can be used to move the seat to the - 2009 Volvo S40 | Owner's Manual - Page 106
Interior Adjust the seat to the desired position. 2. When you leave the car, lock it using the remote control. 3. The next time the driver's door is unlocked with the As a safety precaution, the seat will stop automatically if the button is released before the seat has reached the preset position. - 2009 Volvo S40 | Owner's Manual - Page 107
on. • Neutral position: the interior courtesy lighting comes on when a door is opened, and is switched off 10 seconds after the door is closed. If the courtesy lighting is not switched off manually, it will be turned off automatically 5 minutes after the engine has been switched off. Footwell - 2009 Volvo S40 | Owner's Manual - Page 108
is in positions I, II, or if the engine is running. The courtesy lighting can be switched on or off within 30 minutes after the engine has been switched off, or after a door has been opened or closed. These lights switch off automatically 5 minutes after the engine has been switched off. 04 Vanity - 2009 Volvo S40 | Owner's Manual - Page 109
04 Interior Storage compartments 04 G026508 109 - 2009 Volvo S40 | Owner's Manual - Page 110
Interior intended for light garments owners manual and maps can be stored here. There are also holders for coins, pens and fuel cards. The glove compartment can only be locked and unlocked using the detachable key blade from the central locking system's remote control. See page 120 for information - 2009 Volvo S40 | Owner's Manual - Page 111
04 Interior Storage compartments Storage under the front, center armrest CD storage Cup holders in the center console 04 G018371 G026704 G018372 There are two storage compartments - 2009 Volvo S40 | Owner's Manual - Page 112
04 Interior Storage compartments Storage compartment behind the gear lever 04 If the buttons for optional equipment are not installed, the recess behind the gear lever can be used as a storage compartment for coins, etc. 112 G019623 - 2009 Volvo S40 | Owner's Manual - Page 113
04 Interior Rear seat Rear seat head restraints • To raise: Slide the head restraint up to the desired height. seat belts can be attached to the clothes hook as shown in the illustration. • To lower: Press the catch at the base of the right support and press the head restraint down. NOTE When - 2009 Volvo S40 | Owner's Manual - Page 114
04 Interior Rear seat To fold down one or both sections: 1. Grasp the rear edge of the seat cushion and pull it forward. 2. Pull the catch on the upper outboard edge of the backrest upward and forward to release the backrest lock. A red lock indicator is visible when the backrest is not locked - 2009 Volvo S40 | Owner's Manual - Page 115
04 Interior Trunk Load anchoring eyelets 04 G018099 The eyelets in the trunk can be used to fasten accessory load and lashing straps, load nets, and other load anchors. 115 - 2009 Volvo S40 | Owner's Manual - Page 116
Remote control and key blade...Valet locking ...Keyless drive (option as available)...Locking and unlocking...Child safety locks...Alarm (option)... 118 122 123 127 129 130 116 - 2009 Volvo S40 | Owner's Manual - Page 117
LOCKS AND ALARM 05 - 2009 Volvo S40 | Owner's Manual - Page 118
other keys to an authorized Volvo retailer for reprogramming as an antitheft measure. USA - FCC ID: LTQWFS 125VO This device complies with part 15 of the FCC which is used if new key blades are required. A maxi- Lock - Press the Lock button on the remote once to lock all doors and the trunk. The - 2009 Volvo S40 | Owner's Manual - Page 119
to vehicles with the optional keyless drive). NOTE • lights up the interior lighting, parking lights, and license plate lighting. These lights will switch off automatically after 30, 60 or 90 seconds. See the Personal settings pa ge 83 for information about adjusting the time setting. Unlock trunk - 2009 Volvo S40 | Owner's Manual - Page 120
or by a trained and qualified Volvo service technician. The key blade can be removed from the remote control. When removed, it can be used as follows: When the battery begins to lose its charge, the Information symbol in the instrument panel (see page 55) lights up and KEY BATTERY LOW VOLTAGE - 2009 Volvo S40 | Owner's Manual - Page 121
blade 1. Lock the other door(s) by pressing the lock button on each door. Please note that this does not arm the alarm or lock the trunk. 121 - 2009 Volvo S40 | Owner's Manual - Page 122
compartment and disconnect the trunk from the central locking system (a message appears in the information display) G000000 05 G020032 block access to the trunk and glove compartment for e.g., valet parking or when the car is brought to the retailer for service. To use the valet locking function - 2009 Volvo S40 | Owner's Manual - Page 123
Keyless drive (option as available) used to lock and unlock the vehicle, see page 118 for more information. If one or more doors and/or the trunk is not fully closed when the lock button is pressed, the door(s) or trunk will not be locked. On keyless drive vehicles with an automatic transmission - 2009 Volvo S40 | Owner's Manual - Page 124
a message will be shown in the information display and an audible signal will sound. is only available on vehicles equipped with the optional power driver's seat. NOTE This message will control in his/her possession, the driver's seat will automatically move to the position that it was in when the - 2009 Volvo S40 | Owner's Manual - Page 125
option as available) CAUTION KR55WK48964 NOTE This device complies with part Changes or modifications not expressly approved by the manufacturer could void the user's authority to operate the equipment. Siemens VDO 5WK48891 Tested To Comply With FCC Standards For Automobile Use of the trunk, near the - 2009 Volvo S40 | Owner's Manual - Page 126
05 Locks and alarm Keyless drive (option as available) WARNING People with implanted pacemakers should not allow the pacemaker to come closer than 9 inches (22 cm) to any of the keyless drive - 2009 Volvo S40 | Owner's Manual - Page 127
by pulling up the lock buttons. Each door can also be locked manually using the lock button on that particular door. This applies only if the of the trunk lid, which can be used in an emergency situation to open the trunk from the inside. Pull the handle down to release the trunk lid. After use, the - 2009 Volvo S40 | Owner's Manual - Page 128
and alarm Locking and unlocking Locking the glove compartment 05 The glove compartment can only be locked and unlocked using the detachable key blade on the remote control, see page 120 for information on removing the key blade from the remote control. Insert the key blade in the glove compartment - 2009 Volvo S40 | Owner's Manual - Page 129
05 Locks and alarm Child safety locks Manual child safety locks, rear doors G014697 05 The controls are located on the rear inside edges of the doors, and are only accessible when the - 2009 Volvo S40 | Owner's Manual - Page 130
G020227 The hood is forced open. The trunk is forced open. A door is forced open. The ignition switch is tampered with Disarming the alarm Alarm indicator light • If there is movement in the passenger com• The car is lifted or towed (if the car is equipped with the optional inclination sensor - 2009 Volvo S40 | Owner's Manual - Page 131
instructions. 1. Press MENU to enter the menu system and scroll to Car settings (for a more detailed description of the menus, see page 83. 2. Select Reduced guard. 3. Select Activate once and the message Reduced guard - See manual will appear in the information on the interior lighting for - 2009 Volvo S40 | Owner's Manual - Page 132
05 Locks and alarm Alarm (option) or If you do not wish to deactivate the sensors, do not choose an alternative and lock the vehicle or press EXIT and lock the vehicle. CAUTION • The accessory sensors are automatically reconnected to the alarm system the next time the vehicle is unlocked and then - 2009 Volvo S40 | Owner's Manual - Page 133
05 Locks and alarm 05 133 - 2009 Volvo S40 | Owner's Manual - Page 134
General information...Fuel requirements...Ignition switch...Starting the vehicle...Starting the vehicle with keyless drive (option as available)...Manual transmission, 5-speed (certain markets only)...Manual transmission, 6-speed (certain markets only)...Automatic transmission (option)...Shiftlock - 2009 Volvo S40 | Owner's Manual - Page 135
STARTING AND DRIVING 06 - 2009 Volvo S40 | Owner's Manual - Page 136
. Other factors that decrease gas mileage are: • Whenever possible, avoid using the vehicle for driving short distances. This does not allow the engine to reach normal operating temperature. Dirty air cleaner Dirty engine oil and clogged oil filter Dragging brakes Incorrect front end - 2009 Volvo S40 | Owner's Manual - Page 137
against freezing down to -31 °F (-35 °C). See section "Coolant". The use of "recycled" antifreeze is not approved by 1 Synthetic oil is not used when the oil is changed at the normal maintenance intervals except at owner request and at additional charge. Please consult your Volvo retailer. 137 - 2009 Volvo S40 | Owner's Manual - Page 138
06 • Use Volvo Teflon Lock Spray in the locks. NOTE Avoid using de-icing sprays as they can cause damage to the locks. • Check that engine runs smoothly and that fuel consumption is normal. • Check for fuel, oil, and fluid leakage • Have the transmission oil level checked2. • Check condition of - 2009 Volvo S40 | Owner's Manual - Page 139
General information • Check state of the battery's charge. • Examine tires carefully (the spare tire as well), and replace those that are worn. Check tire pressures. • The brakes, front wheel alignment, and steering gear should be checked by your Volvo retailer only. • Check all lights, including - 2009 Volvo S40 | Owner's Manual - Page 140
Volvo service technician for correction. Volvo engines are designed to achieve rated horsepower, torque, and fuel economy performance using premium 91 octane fuel to higher octane fuel (91 or higher) or to change gasoline brands to fully utilize your • refueling only at gas stations with vapor - 2009 Volvo S40 | Owner's Manual - Page 141
fuels are used, your Emission Control System performance may be affected, and the Check Engine Light (malfunction indicator lamp) located on your instrument panel may light. If this occurs, please return your vehicle to a trained and qualified Volvo service technician for maintenance. Fuel filler - 2009 Volvo S40 | Owner's Manual - Page 142
• 1 If the fuel filler cap is not closed tightly or if the engine is running when the vehicle is refueled, the Check Engine Light (malfunction indicator lamp) may indicate a fault. However, your vehicle's performance will not be affected. Use only Volvo original or approved fuel filler caps. 142 - 2009 Volvo S40 | Owner's Manual - Page 143
to position 0. Turn the key to this position and release it immediately. The key returns automatically to the Drive position. A chime will sound if optional keyless drive). I - Intermediate position2 Certain accessories, radio, etc. on, daytime running lights off. 06 1 2 Automatic transmission - 2009 Volvo S40 | Owner's Manual - Page 144
switch1. When starting in cold weather, the transmission may shift up at slightly higher engine speeds than normal until the automatic transmission fluid reaches normal operating temperature. Do not race a cold engine immediately after starting. Oil flow may not reach some lubrication points fast - 2009 Volvo S40 | Owner's Manual - Page 145
the vehicle WARNING Volvo's floor mats are specially manufactured for your car. They must be firmly secured in the clips on the floor so that they cannot slide and become trapped under the pedals on the driver's side. • Always place the gear selector in Park (P) (manual transmission: first or - 2009 Volvo S40 | Owner's Manual - Page 146
III and release it. The starter motor will then operate automatically (for up to ten seconds) until the engine starts. Removing optional keyless drive. This control is used in the same way as the ignition key to start the engine. See also page 144 for general information on starting the engine - 2009 Volvo S40 | Owner's Manual - Page 147
markets only) 5-speed manual transmission (option on certain models) Engaging reverse gear, 5-speed transmission CAUTION Never shift into reverse while moving forward. WARNING An extra mat on the driver's floor can cause the accelerator, brake, and/or clutch pedal to catch. Check that the movement - 2009 Volvo S40 | Owner's Manual - Page 148
markets only) 6-speed manual transmission (option on certain models) Engaging reverse gear, 6-speed transmission CAUTION Never shift into reverse while moving forward. WARNING An extra mat on the driver's floor can cause the accelerator, brake, and/or clutch pedal to catch. Check that the movement - 2009 Volvo S40 | Owner's Manual - Page 149
06 Starting and driving Automatic transmission (option) Shiftgate positions Gear selector positions P - Park Select the P position when starting or parking. In P, the transmission is mechanically blocked (Shiftlock). Always apply the parking brake when parking. R - Reverse The car must be - 2009 Volvo S40 | Owner's Manual - Page 150
) can be selected at any time to manually select forward gears, including while the car is moving. • If you slow to a very low speed, the transmission will automatically shift down. Cold starts (turbo engines) When driving before the engine has reached its normal operating temperature, the - 2009 Volvo S40 | Owner's Manual - Page 151
and the brake pedal is depressed. In certain cases it may be necessary to move the gear selector from the Park position manually. 06 To manually override the Shiftlock system: 1. Apply the parking brake. 2. Depress the brake pedal. 3. There is a small cover below P-R-N-D on the gear selector panel - 2009 Volvo S40 | Owner's Manual - Page 152
pattern, load, speed, traction, temperature, and treadwear rating. Never drive on mixed tires, except for brief periods when the temporary spare tire is in use. Always use properly inflated tires of correct dimensions. Tire size and inflation pressures are shown on a placard located on the driver - 2009 Volvo S40 | Owner's Manual - Page 153
limiting brake lockup. When the system "senses" impending lockup, braking pressure is automatically modulated in order to help prevent lockup that could lead to a skid. The system performs a self-diagnostic test when the engine is started and when the vehicle first reaches a speed of approximately - 2009 Volvo S40 | Owner's Manual - Page 154
a trained and qualified Volvo service technician to have the brake system checked. NOTE • Electronic Brake Force Distribution (EBD) EBD is an integrated part of the ABS system. EBD regulates the hydraulic pressure to the rear brakes to help provide optimal braking capacity. The switching of the - 2009 Volvo S40 | Owner's Manual - Page 155
automatically enabled each time the engine is started. tem functions are active. A - thumb wheel, B - RESET button • • Spin control (SC) The spin control function is designed maximum tractive force1. Option on certain models. 06 Traction control - TC This function is designed to help reduce - 2009 Volvo S40 | Owner's Manual - Page 156
be switched off. Information symbol WARNING The adapted to traffic and road conditions. WARNING The SERVICE REQUIRED" - the system has been automatically disengaged due to a fault. A trained and qualified Volvo service technician should check the system. • If this light stays on after the engine - 2009 Volvo S40 | Owner's Manual - Page 157
the gear selector in neutral. For vehicles with automatic transmissions, follow instruction on page 151, "Shiftlock override" to allow the gear selector to be moved from the Park position. 5. Keep firm pressure on the brake pedal while releasing the parking brake. 6. When towing has been completed - 2009 Volvo S40 | Owner's Manual - Page 158
when engine is not running. The braking and steering systems will function but the brake pedal pressure fuel into the three-way catalytic converter(s), causing overheating, backfiring, and damage, see page 159 for instructions on jump starting the vehicle. • It is equally important not to use - 2009 Volvo S40 | Owner's Manual - Page 159
the engine has started, first remove the negative (-) terminal jumper cable. Then remove the positive (+) terminal jumper cable. G020298 WARNING Do not connect the jumper cable to any part of the fuel system or to any moving parts. Avoid touching hot manifolds. • • Batteries generate hydrogen gas - 2009 Volvo S40 | Owner's Manual - Page 160
particular problems, but take into consideration: • More frequent vehicle maintenance is required. • Volvo recommends the use of Volvo trailer hitches that are specially designed for the vehicle. • Remove the ball and drawbar assembly when the hitch is not being used. • Increase tire pressure to - 2009 Volvo S40 | Owner's Manual - Page 161
is equipped with a manual transmission, make sure the gear you select does not put too much strain on the engine (using too high a gear). The drawbar assembly/trailer hitch may be rated for trailers heavier than the vehicle is designed to tow. Please adhere to Volvo's recommended trailer weights - 2009 Volvo S40 | Owner's Manual - Page 162
/hitch assembly. 2. Pull the ball holder out of the hitch assembly. G010496 E B NOTE A cover for the hitch assembly is also included in the kit. Safety wire attachment 1. If necessary, remove the cotter pin from the locking bolt and slide the locking bolt out of the hitch assembly. 2. Slide the - 2009 Volvo S40 | Owner's Manual - Page 163
on the roof. Load carriers (accessory) Load carriers are available as Volvo accessories. Follow the installation instructions supplied with the load carriers. Observe the following points when using load carriers: • The car's wind resistance and fuel consumption will increase with the size of the - 2009 Volvo S40 | Owner's Manual - Page 164
appear in the information display in the instrument panel. If this occurs, clean the camera lenses. If necessary, the system can be temporarily switched off (for instructions see page 166). CAUTION The BLIS system should only be repaired by a trained and qualified Volvo service technician. 164 - 2009 Volvo S40 | Owner's Manual - Page 165
both of the above mentioned conditions, a message will appear in the information display. When driving in such conditions, the system's function will be limited or it may be temporarily switched off, see page 166 for instructions. When the message is no longer displayed, BLIS will return to normal - 2009 Volvo S40 | Owner's Manual - Page 166
and driving Blind Spot Information System (BLIS)-option Limitations In certain situations, the BLIS indicator light(s) may illuminate even the illustration) Light reflected from a wet road surface BLIS is automatically activated when the ignition is switched on. The indicator lights will provide - 2009 Volvo S40 | Owner's Manual - Page 167
06 Starting and driving Blind Spot Information System (BLIS)-option when the system is switched off, and a text message is displayed. • BLIS can be switched on again by pressing the button. The indicator light in the button will illuminate and a new text message will be displayed. Press the READ - 2009 Volvo S40 | Owner's Manual - Page 168
if Volvo genuine trailer wiring is used. Front park assist The distance monitored in front of the vehicle is approximately 2.5 ft (0.8 m). The audible signal comes from the audio system's front speakers. It may not be possible to combine auxiliary headlights and front park assist since these lights - 2009 Volvo S40 | Owner's Manual - Page 169
(Option/accessory) Activating/deactivating park assist NOTE Faults in the system If the information symbol illuminates and PARK ASSIST SERVICE REQUIRED is shown on the information display, this indicates that the system is not functioning properly and has been disengaged. Consult a Volvo retailer - 2009 Volvo S40 | Owner's Manual - Page 170
06 Starting and driving Park assist (Option/accessory) Cleaning the sensors Park assist sensors 06 The sensors must be cleaned regularly to ensure that they work properly. Clean them with water and a suitable - 2009 Volvo S40 | Owner's Manual - Page 171
06 Starting and driving 06 171 - 2009 Volvo S40 | Owner's Manual - Page 172
information...Tire inflation...Inflation pressure-U.S. models ...Inflation pressure-Canadian models ...Tire designations...Glossary of tire terminology...Vehicle loading...Uniform tire quality gradings...Snow chains, snow tires, studded tires...Temporary spare...Wheel nuts...Tire rotation...Changing - 2009 Volvo S40 | Owner's Manual - Page 173
WHEELS AND TIRES 07 - 2009 Volvo S40 | Owner's Manual - Page 174
opening), or on the inside of the fuel filler door on Canadian models. optimum road holding on icy or snow-covered roads, we recommend suitable winter tires on all four wheels. When replacing tires, be sure that the new tires are the same size designation, type (radial) and preferably from the same - 2009 Volvo S40 | Owner's Manual - Page 175
be identical in type (radial) and size as the one being replaced. Using a tire of the same make (manufacturer) will prevent alteration of the driving characteristics of the vehicle. 07 Improving tire economy • Maintain correct tire pressure. For the tire pressure tables, see page 178. • Drive - 2009 Volvo S40 | Owner's Manual - Page 176
on the vehicle's tire information placard or certification label. 07 Use a tire gauge to check the tire inflation pressure, including the spare, at least once a month and before long trips. You are strongly urged to buy a reliable tire pressure gauge, as automatic service station gauges may be - 2009 Volvo S40 | Owner's Manual - Page 177
inflation tables, see page 178, or see the inflation pressure placard. • 07 To check inflation pressure: 1. Remove the cap from the valve on one tire, then firmly press the tire gauge onto the valve. Load ratings The load ratings in the tables above translate as follows: 91 = 1365 lbs (615 kg - 2009 Volvo S40 | Owner's Manual - Page 178
Wheels and tires Inflation pressure-U.S. models Tire inflation pressure table The following tire pressures are recommended by Volvo for your vehicle. Refer to the tire inflation placard for information specific to the tires installed on your vehicle at the factory. Tire size Cold tire pressure up - 2009 Volvo S40 | Owner's Manual - Page 179
tire pressures are recommended by Volvo for your vehicle. Refer to the tire inflation placard for information specific to the tires installed on your vehicle at the factory. Tire size Cold tire pressures Up to five persons psi (kPa) Front Rear 36 (250) 36 (250) 36 (250) 61 (420) Optional pressure - 2009 Volvo S40 | Owner's Manual - Page 180
maximum speed at which the tire is designed to be driven for extended periods of time, carrying a permissible load for the vehicle, and with correct inflation pressure. For example, H indicates a speed rating of 130 mph (210 km/h). NOTE This information may not appear on the tire because it is not - 2009 Volvo S40 | Owner's Manual - Page 181
door or on the inside of the fuel filler door on Canadian models, for the correct tire pressure for your vehicle. Treadwear, Traction, and Temperature grades: See page 185 for more information. Maximum permissible inflation pressure: The greatest amount of air pressure that should ever be put in the - 2009 Volvo S40 | Owner's Manual - Page 182
of each tire providing information about the tire brand and manufacturing plant, tire size and date of manufacturer. • Tread area of the tire: Area of the perimeter of the tire that contacts the road when mounted on the vehicle. • Rim: The metal support (wheel) for a tire or a tire and tube - 2009 Volvo S40 | Owner's Manual - Page 183
important weight limits for your vehicle can be found on page 265. Capacity weight All weight added to the curb weight, including cargo and optional equipment. When towing, trailer hitch tongue load is also part of cargo weight. Steps for Determining Correct Load Limit (1) Locate the statement - 2009 Volvo S40 | Owner's Manual - Page 184
axle weight, gross vehicle weight, or any other weight rating limits can cause tire overheating resulting in permanent deformation or catastrophic failure. Do not use replacement tires with lower load carrying capacities than the tires that were original equipment on the vehicle because this will - 2009 Volvo S40 | Owner's Manual - Page 185
government course as a tire graded 100. The relative performance of tires depends upon the actual conditions of their use, however, and many depart significantly from the norm due to variation in driving habits, maintenance practices and differences in road characteristics and climate. TEMPERATURE - 2009 Volvo S40 | Owner's Manual - Page 186
only. Use only Volvo approved snow chains. • Winter tires wear more quickly on dry roads in warm weather. They should be removed when the winter driving season has ended. • If accessory, aftermarket or "custom" tires and wheels are installed and are of a size different than the original tires and - 2009 Volvo S40 | Owner's Manual - Page 187
Spare". Recommended tire pressure (see the placard on the B-pillar or on the fuel filler door) should be maintained irrespective of which position on the car the temporary spare tire is used on. In the event of damage to this tire, a new one can be purchased from your Volvo retailer. WARNING - 2009 Volvo S40 | Owner's Manual - Page 188
07 Wheels and tires Wheel nuts Wheel nuts WARNING Never use the short type of nut for aluminium wheels. This could cause the wheel to come loose. Aluminum wheels - high nut Only the high type of nut can be used for aluminum wheels. This is considerably different from other types of nut because it - 2009 Volvo S40 | Owner's Manual - Page 189
problems can make tire wear worse. Tire rotation Your vehicle has no recommended tire rotation. The following information is intended to help you understand why. If you do rotate your tires... Please follow the tire manufacturer's recommendations, as outlined in the tire manufacturers tire warranty - 2009 Volvo S40 | Owner's Manual - Page 190
, and crank are located under the carpet on the floor of the trunk. To change a tire: 1. Apply the parking brake. 2. Put the gear selector in Park (P) or reverse on models with a manual transmission. 07 5. With the car still on the ground, use the lug wrench to loosen the wheel nuts 1/2-1 turn by - 2009 Volvo S40 | Owner's Manual - Page 191
any part of your body to be extended under a car supported by a jack. Use the jack intended for the car when changing a tire. For any other job, use stands to support the car. Apply the parking brake and put the gear selector in the Park (P) position or reverse on models with a manual transmission - 2009 Volvo S40 | Owner's Manual - Page 192
or tears cannot be repaired with the tire sealing system. WARNING • • After using the tire sealing system, the vehicle should not be driven farther than approximately 120 miles (200 km). Have the tire inspected by a trained and qualified Volvo service technician as soon as possible to determine - 2009 Volvo S40 | Owner's Manual - Page 193
objects (nails, etc.) from the tire before using the sealing system. • • Stage 2: The tire's inflation pressure is checked and adjusted if necessary. Precautions: WARNING Never leave the tire sealing system unattended when it is operating. Keep the tire sealing system away from children - 2009 Volvo S40 | Owner's Manual - Page 194
the rim, the tire cannot be repaired. The vehicle should not be driven if this occurs. Contact a towing service or Volvo On Call Roadside 8. Connect the electrical wire to the nearest 12-volt socket in the vehicle. 9. Start the vehicle's engine. 10. Start the tire sealing system's compressor by - 2009 Volvo S40 | Owner's Manual - Page 195
air release knob counterclockwise. Safely stow the tire sealing system in a convenient place as it will soon be used again to check the tire's inflation pressure. The empty bottle of sealing compound cannot be removed from the bottle holder. Consult a trained and qualified Volvo service technician - 2009 Volvo S40 | Owner's Manual - Page 196
Volvo retailer for replacement parts. If the sealing compound bottle's expiration date has passed, please take it to a Volvo retailer or a recycling station that can properly dispose of harmful substances. WARNING • • The vehicle's engine should be running when the tire sealing system is used - 2009 Volvo S40 | Owner's Manual - Page 197
reduces fuel efficiency and tire tread life, and may affect the vehicle's handling and stopping ability. Please note that the TPMS is not a substitute for proper tire maintenance, and it is the driv- When low inflation pressure is detected, TPMS will light up the tire pressure warning light (also - 2009 Volvo S40 | Owner's Manual - Page 198
low tire pressure but does not replace normal tire maintenance. For information on correct tire pressure, please refer to the tables beginning, see page 178, or consult your Volvo retailer. The tire pressure warning light will not identify which tire is underinflated. Be sure to check all four tires - 2009 Volvo S40 | Owner's Manual - Page 199
07 Wheels and tires 07 199 - 2009 Volvo S40 | Owner's Manual - Page 200
Washing and cleaning the car...202 Paint touch up...206 200 G020920 - 2009 Volvo S40 | Owner's Manual - Page 201
CAR CARE 08 - 2009 Volvo S40 | Owner's Manual - Page 202
. • After cleaning the engine, the spark plug wells should Volvo recommends the use of special cleaning products, available at your Volvo retailer, for cleaning colored plastic, rubber, or ornamental components such as chromed strips on the exterior of your vehicle. The instructions for using - 2009 Volvo S40 | Owner's Manual - Page 203
can reduce lighting capacity considerably. Clean the headlights regularly, for example when refueling. When washing or steam cleaning the engine, avoid spraying water or steam directly on the electrical components or toward the rear side of the engine. Always close the moonroof (option) and sun - 2009 Volvo S40 | Owner's Manual - Page 204
, scuffing, and fading can result. Volvo offers an easy-to-use, non-greasy leather care kit formulated to clean and beautify your vehicle's leather, and to renew the protective qualities of its finish. The cleaner removes dirt and oil buildup. The light cream protectant restores a barrier against - 2009 Volvo S40 | Owner's Manual - Page 205
the use of Volvo rubber floor mats. Consult your Volvo retailer. • Under no circumstances should gasoline, naphtha or similar cleaning agents be used on the plastic or the leather since these can cause damage. Take extra care when removing stains such as ink or lipstick since the coloring can - 2009 Volvo S40 | Owner's Manual - Page 206
check the finish regularly - when washing the vehicle for instance. Touch-up if necessary. Paint repairs require special equipment and skill. Contact a trained and authorized Volvo service technician for any extensive damage. Minor scratches can be repaired by using Volvo Deep scratches Color code 1. - 2009 Volvo S40 | Owner's Manual - Page 207
08 Car care 08 207 - 2009 Volvo S40 | Owner's Manual - Page 208
Volvo maintenance...Maintaining your car...Hood...Engine compartment...Engine oil...Fluids...Wiper blades...Battery...Replacing bulbs...Fuses... 210 212 214 215 216 218 220 221 223 230 208 G020922 - 2009 Volvo S40 | Owner's Manual - Page 209
MAINTENANCE AND SERVICING 09 - 2009 Volvo S40 | Owner's Manual - Page 210
, specify time-tested and proven Genuine Volvo Parts and Accessories. Maintenance Your Volvo passed several major inspections before it was delivered to you, in accordance with Volvo specifications. The maintenance procedures outlined in the Warranty and Service Records Information booklet, many - 2009 Volvo S40 | Owner's Manual - Page 211
09 Maintenance and servicing Volvo maintenance • law enforcement or government agencies • others who may assert a legal right to know, or who obtain your consent to know such information. 09 211 - 2009 Volvo S40 | Owner's Manual - Page 212
loose terminal connector, or a battery near the end of its useful service life. Consult a trained and qualified Volvo service technician for additional information. How Can I Prepare for My Next OBD II Emission Inspection? • If your Check Engine (MIL) light is lit - or was lit but went out without - 2009 Volvo S40 | Owner's Manual - Page 213
09 Maintenance and servicing Maintaining your car your vehicle diagnosed and, if necessary, serviced by a qualified Volvo technician. 09 • If you recently had service for a lit Check Engine light, or if you had service that required disconnecting the battery, a period of driving is necessary to - 2009 Volvo S40 | Owner's Manual - Page 214
09 Maintenance and servicing 09 Hood Opening the hood To open the hood: 1. Pull the lever located under the left side of the dash to release the hood lock. 2. Lift the hood slightly. 3. Press up the release control located under the front edge of the hood (at the center) up to the right, and lift - 2009 Volvo S40 | Owner's Manual - Page 215
09 Maintenance and servicing Engine compartment 09 Cooling system expansion tank Power steering fluid reservoir (concealed behind the headlight) Dipstick - engine oil Radiator Cooling fan Washer fluid reservoir Engine oil filler cap Brake/clutch fluid reservoir Battery Relay/fuse box Air cleaner - 2009 Volvo S40 | Owner's Manual - Page 216
09 Maintenance and servicing 09 Engine oil Changing engine oil and oil filter See page 269 for oil specifications. Refer to the Warranty and Service Records Information booklet for information on the oil change intervals. Volvo recommends Castrol. NOTE • • Volvo does not recommend the use of oil - 2009 Volvo S40 | Owner's Manual - Page 217
Maintenance and servicing Engine oil WARNING Do not allow oil to spill onto or come into contact with hot exhaust pipe surfaces 09 NOTE Volvo uses different systems to indicate a low oil level or pressure. Some models have an oil pressure sensor, in which case a warning symbol (see page 57) is used - 2009 Volvo S40 | Owner's Manual - Page 218
not kept filled, there can be high local temperatures in the engine which could result in damage. Check coolant regularly! Do not top up with water only. This reduces does not need to be changed. If the system must be drained, consult a trained and qualified Volvo service technician. • • 218 - 2009 Volvo S40 | Owner's Manual - Page 219
technician. Brake fluid Power steering fluid The fluid level is checked at each service interval. Fluid type: Volvo power steering fluid or equivalent. Replace: No fluid change required. WARNING If a problem should occur in the power steering system or if the vehicle has no electrical current - 2009 Volvo S40 | Owner's Manual - Page 220
09 Maintenance and servicing 09 Wiper blades Replacing windshield wiper blades Keeping the windshield wiper blades clean helps improve visibility and prolongs the service life of the wiper blades. See page 202 for washing instructions. 1. Fold out the wiper arm. 2. Press the button on the wiper - 2009 Volvo S40 | Owner's Manual - Page 221
09 Maintenance and servicing Battery Battery maintenance Driving habits and conditions, climate, the number of starts, etc., all affect the service life and function of the battery. In order for your battery to perform satisfactorily, keep the following in mind: Check the fluid level in each cell in - 2009 Volvo S40 | Owner's Manual - Page 222
Maintenance and servicing 09 Battery 3. Remove the cover over the battery. 4. Disconnect the battery negative (ground) cable. 5. Disconnect the positive cable. 6. Remove the front side of the battery box with a screwdriver. 7. Release place in the engine compartment. 2. NOTE Used batteries should be - 2009 Volvo S40 | Owner's Manual - Page 223
Volvo service technician: • • The engine should not be running when changing bulbs. When changing in the headlight housing, if the engine has been running just prior to replacing bulbs, please be aware that components in the engine compartment will be hot. • • Brake lights Bi-Xenon headlights - 2009 Volvo S40 | Owner's Manual - Page 224
the housing in the reverse order. Check that the retaining pin is correctly inserted. WARNING Bi-Xenon headlights (option) - due to the high voltage used by these headlights, these bulbs should only be replaced by a trained and qualified Volvo service technician. Cover with retaining clamps - 2009 Volvo S40 | Owner's Manual - Page 225
09 Maintenance and servicing Replacing bulbs High beam bulb (halogen) WARNING Bi-Xenon headlights (option) - due to the high voltage used by these headlights, the Bi-Xenon bulbs should only be replaced by a trained and qualified Volvo service technician. 09 Parking light bulb 4. Driver's side - 2009 Volvo S40 | Owner's Manual - Page 226
Maintenance and servicing 09 Replacing bulbs Turn signal Side marker light Front fog light (option) G019150 G018050 1. Open the hood. 2. Remove the headlight to release the retaining clips. 3. Grasp the edge of the panel and pull it straight out. 4. Unscrew the screw in the fog light housing and - 2009 Volvo S40 | Owner's Manual - Page 227
holder NOTE If the message indicating a burned out bulb remains in the information display after the bulb has been replaced, consult a trained and qualified Volvo service technician. Location of taillight bulbs High-level brake light These bulbs should only be replaced by a trained and qualified - 2009 Volvo S40 | Owner's Manual - Page 228
09 Maintenance and servicing 09 Replacing bulbs License plate lighting Footwell lighting Trunk lighting G014843 G020795 1. Switch off all lights and turn the key to position 0. 2. Remove the screws with a screw driver. 3. Detach the entire bulb housing and carefully pull it out. Turn the - 2009 Volvo S40 | Owner's Manual - Page 229
09 Maintenance and servicing Replacing bulbs Vanity mirror lighting 6. Press the three lower lugs back into place screwdriver under the edge on the left and right-hand sides (near the black rubber sections) and pry carefully to release the lower edge of the mirror. 3. Pry carefully and lift out the - 2009 Volvo S40 | Owner's Manual - Page 230
if it is intact. 3. If the wire is broken, insert a new fuse of the same color and amperage (written on the fuse). If fuses burn out repeatedly, have the electrical system inspected by a trained and qualified Volvo service technician. WARNING Never use metal objects or fuses with higher amperage - 2009 Volvo S40 | Owner's Manual - Page 231
09 Maintenance and servicing Fuses Fuse box in the engine compartment 09 The fuse box in the engine compartment has positions for 36 fuses. • Fuses 1-18 are relays/circuit breakers and should only be removed or replaced by an authorized Volvo service technician. • Fuses 19-36 may be changed at - 2009 Volvo S40 | Owner's Manual - Page 232
pump ABS valves 50A 80A 60A 60A 80A 9. 10. 11. 12. 13. 14. 15. Engine functions Climate system blower Headlight washers Feed to heated rear window Starter motor relay Trailer connector (accessory) Not in use Feed to audio system 30A 40A 20A 30A 30A 40A 17. 18. 19. 20. 21. 22. 23. Windshield - 2009 Volvo S40 | Owner's Manual - Page 233
09 Maintenance and servicing Fuses 24. 25. 26. 27. 28. 29. 30. 31. 32. 33. 34. 35. Not in use Not in use Ignition switch A/C compressor Not in use Front fog lights (option) Not in use Not in use Fuel injectors Heated oxygen sensor, vacuum pump Ignition coils, climate unit pressure sensor Engine - 2009 Volvo S40 | Owner's Manual - Page 234
09 Maintenance and servicing 09 Fuses Fuse box in the passenger compartment The fuse with a small screwdriver and then pulling the pins out. 2. Turn both retaining screws (2) counterclockwise until they release. 3. Fold down the fuse box (3) half way. Pull it toward the seat until it stops. Fold - 2009 Volvo S40 | Owner's Manual - Page 235
, and footwells Interior lighting Windshield washers 10A G020246 49. Supplemental Restrain System (SRS), Occupant Weight Sensor (OWS) Not in use AWD, fuel filter relay Transmission control module (TCM), ABS Power steering Park assist (option) BiXenon headlights (option) Not in use 10A 45. 46 - 2009 Volvo S40 | Owner's Manual - Page 236
09 Maintenance and servicing 09 Fuses 56. Volvo Navigation System remote control module (option), alarm siren control module On-board diagnostic socket, brake light switch Right high beam, auxiliary lights relay Left high beam Heated driver's seat (option) Heated passenger's seat (option) Moonroof - 2009 Volvo S40 | Owner's Manual - Page 237
09 Maintenance and servicing 09 237 - 2009 Volvo S40 | Owner's Manual - Page 238
Audio functions...Radio functions...CD player/CD changer...Audio menu...Bluetooth hands-free connection... 240 244 249 253 254 238 G020924 - 2009 Volvo S40 | Owner's Manual - Page 239
AUDIO 10 - 2009 Volvo S40 | Owner's Manual - Page 240
. 4. Set your music player's headphone volume to three-quarters using the player's volume controls. 5. Press MENU on the audio system repeatedly to toggle between the CD player and the optional external sound source AUX or the optional Sirius satellite radio. The currently selected sound source will - 2009 Volvo S40 | Owner's Manual - Page 241
automatically according to the vehicle's speed, see page 243 for more information on this function. Daytime/twilight display In daylight the information is displayed against a light background. In darkness it is displayed against a dark background. Steering wheel keypad USB/iPod connector (option - 2009 Volvo S40 | Owner's Manual - Page 242
. However, there may be versions of these formats that the system does not support. For further information, refer to the accessory manual USB/iPod Music Interface. FADER-set the front/rear sound balance SUBWOOFER (accessory)-set the level for the subwoofer (bass speaker) CENTER-make settings for - 2009 Volvo S40 | Owner's Manual - Page 243
Audio functions Surround sound Surround sound settings are used to balance sound levels throughout the vehicle. Surround or exit without saving by pressing EXIT. 10 rately. Automatic sound control The audio system's volume is adjusted automatically according to the speed of the vehicle. There - 2009 Volvo S40 | Owner's Manual - Page 244
be selected using the preset buttons (2). Press EXIT (6) to terminate the automatic storing function /right sides of the control to search for or change radio stations/CD tracks 6. EXIT-press to cancel in which you are driving Storing preset stations Manually storing a station 1. Tune to the desired - 2009 Volvo S40 | Owner's Manual - Page 245
be saved in the memory for manually preset stations. 1. Press AUTO roof racks or in a ski box, or other antennas that may impede signals from the SIRIUS satellites. • Radio text Scanning SCAN (4) automatically (see page 244 for information on the standard radio using the AM/FM button (2). 245 - 2009 Volvo S40 | Owner's Manual - Page 246
SIRIUS ID is required when contacting the Sirius Call Center. It is used to activate your account and when making any account transactions. The SIRIUS directly: NOTE SCAN automatically searches through the list of satellite channels. see page 245 for more detailed information. Storing a channel - 2009 Volvo S40 | Owner's Manual - Page 247
1. Press MENU. 2. Scroll to "Add song to song mem." and follow the instructions shown in the display. If a new song is selected when the memory is full access code can be displayed or changed • Your Sirius ID can be displayed Skip options This function is used to remove a channel from the list - 2009 Volvo S40 | Owner's Manual - Page 248
checked box will CHANGE CODE This function makes it possible to change the channel access code. The default code is 0000. To change the code: 1. Select CHANGE Your Volvo specific channels can be restricted (locked). A locked channel will not provide audio, song titles, or artist information - 2009 Volvo S40 | Owner's Manual - Page 249
the CD will play automatically. 10 NOTE If a CD is in the slot when by pressing the MODE button (5). 2. Select an empty position using the 1 - 6 buttons or the up/down keys on the the control to change CD tracks/fast forward/back Buttons for selecting a disc in the optional CD changer CD - 2009 Volvo S40 | Owner's Manual - Page 250
used while the vehicle is at a standstill and will be cancelled if the vehicle begins to move. For reasons of traffic safety, the ejected CD must be removed within 12 seconds or it will be automatically keys on the optional steering wheel keypad) read by the player. Changing tracks Briefly press the - 2009 Volvo S40 | Owner's Manual - Page 251
menu and press ENTER. > If information is stored on the disc, it will listening problems due to the quality of the disc or recording equipment used. CD automatically deactivated when another disc is selected. • DualDisc: The audio side of a DualDisc (combined CD/DVD) does not meet CD specifications - 2009 Volvo S40 | Owner's Manual - Page 252
10 Audio CD player/CD changer • Never use cleaning spray or antistatic liq10 uid. Use only cleaners specifically made for CDs. • Use discs of the correct size only (3.5" discs should never be used). • Volvo does not recommend the use of plastic outer rings on the disc. • Condensation may occur - 2009 Volvo S40 | Owner's Manual - Page 253
10 Audio Audio menu FM1/FM2 menu 1. RADIOTEXT ON/OFF 2. ADVANCED RADIO SETTINGS 3. AUDIO SETTINGS 10 AM menu 1. AUDIO SETTINGS CD menu 1. RANDOM 2. AUDIO SETTINGS CD changer menu 1. RANDOM 2. DISC TEXT ON/OFF 3. AUDIO SETTINGS AUX menu 1. AUX VOLUME 2. SOUND SETTINGS 253 - 2009 Volvo S40 | Owner's Manual - Page 254
list of compatible phones is available at your Volvo retailer or at www.volvocars.com Connecting cell using the vehicle's menus 1. Activate the cell phone's Bluetooth function (refer to the phone's owner's manual see page 258). Bluetooth hands-free This option makes it possible to set up a - 2009 Volvo S40 | Owner's Manual - Page 255
for several seconds). 2. Perform a search using the cell phone's Bluetooth function (consult the cell phone's owner's manual if necessary). 3. Select and will be connected automatically to the audio system while the text Synchronising is displayed. For more information on synchronizing a cell - 2009 Volvo S40 | Owner's Manual - Page 256
Use the tones is used. • Microphone system sound can be automatically muted when a phone use the connected cell phone's ring tone1, go to Phone settings Sounds and volume Ring signal Use the mute function is used, which is normal progress. More information about registering and Automatic connection When - 2009 Volvo S40 | Owner's Manual - Page 257
to be made via voice commands, this function can be used by pressing and holding ENTER. 10 NOTE If a particular cell phone does not support copying of the phone book, List is empty will be displayed when copying has been completed. Manual connection To connect a phone other than the one that was - 2009 Volvo S40 | Owner's Manual - Page 258
been entered. Use the / buttons on the center console to navigate among the characters. Phone settings 6.1. Call options 6.1.2. 6.1.3. Automatic answer Voice calls Phone book 4.1. 4.2. Search Copy fr. mobile phone 5. Bluetooth...5.1. 5.2. 5.3. Change phone Connect phone Disconnect phone 258 - 2009 Volvo S40 | Owner's Manual - Page 259
10 Audio 10 259 - 2009 Volvo S40 | Owner's Manual - Page 260
Label information...Dimensions and weights...Fuel, oils, and fluids...Engine oil...Engine specifications...Electrical system...Three-way catalytic converter...Volvo programs... 262 264 267 269 270 272 274 275 260 G000000 - 2009 Volvo S40 | Owner's Manual - Page 261
SPECIFICATIONS 11 - 2009 Volvo S40 | Owner's Manual - Page 262
11 Specifications Label information 11 262 G032544 G026483 - 2009 Volvo S40 | Owner's Manual - Page 263
Identification Number (VIN). Codes for color and upholstery, etc. tification label on the underside of the hood. For further information regarding these regulations, please consult your Volvo retailer. Federal Motor Vehicle Safety Standards (FMVSS) specifications (USA) and Ministry of Transport - 2009 Volvo S40 | Owner's Manual - Page 264
11 Specifications Dimensions and weights Dimensions 11 Position A B C D E F G Dimension Wheelbase Length Load length, floor, seatback down Load length, floor Height Track, front Track, rear in. (mm) 103.9 in. (264 cm) 175.9 in. (447 cm) - 2009 Volvo S40 | Owner's Manual - Page 265
AWDB Capacity weight Turbo: 4450 lbs FWD: 800 lbs AWD: 800 lbs Permissible axle weight, front FWD: 2380 lbs FWD Turbo: 2380 lbs AWD Turbo: 2420 lbs Permissible axle weight, rear FWD: 2130 lbs FWD Turbo: 2130 lbs AWD Turbo: 2220 lbs Curb weight FWD: 3165-3300 lbs AWD: 3415-3455 lbs Max. roof - 2009 Volvo S40 | Owner's Manual - Page 266
weight FWD = Front Wheel Drive AWD = All Wheel Drive Models equipped with the B5244S7 engine (engine code 39, which is the 6th and 7th digits from the left in your vehicle's VIN number, see chapter Label information, for the location of the VIN plate), may not be used to tow trailers or vehicles of - 2009 Volvo S40 | Owner's Manual - Page 267
number. see page 262 for the location of the VIN plate. 11 Engine oil (with filter replacement) Automatic transmission oil Manual transmission oil See page 269 for information on engine oil specifications. Non-turbo engine: JWS 3309 BOT 130 6.1 US quarts (5.8 liters) 8.19 US quarts (7.75 liters - 2009 Volvo S40 | Owner's Manual - Page 268
fluid reservoir Air conditioning system 11 Specification Use washer fluid solvent in cold weather conditions. Refrigerant - R134a Capacity 6.8 US quarts (6.5 liters) 1.2 lbs. (530 grams) NOTE The transmission oil does not normally need to be changed during the service life of the vehicle. However - 2009 Volvo S40 | Owner's Manual - Page 269
your area, Volvo recommends, for the protection of your engine, that you use a heavier weight oil, such as such as SAE 5W-40 or 0W-40. See the viscosity chart. G022917 The API Service Symbol "donut" is divided into three parts: NOTE Synthetic oil is not used when the oil is changed at the normal - 2009 Volvo S40 | Owner's Manual - Page 270
± 0.1mm 22.5 ft. lbs./30 Nm Volvo kit no. 30650843 (3x) 0.024 ± 0.004 in./0.6 ± 0.1mm 22.5 ft. lbs./30 Nm Volvo kit no. 30650379 0.027in./0.7mm 22.5 ft. lbs./30 Nm Certain markets The engine specifications for horsepower and torque listed in this table are based on the use of premium fuel. 270 - 2009 Volvo S40 | Owner's Manual - Page 271
11 Specifications Engine specifications Charge air cooler (Intercooler) Turbocharged engines employ a turbo-compressor to force air into the engine inlet manifold and a charge air cooler to cool the compressed inlet air. The resulting increase in air flow raises pressure in the intake manifold and - 2009 Volvo S40 | Owner's Manual - Page 272
Specifications Electrical system General information 12-volt system with voltage controlled generator. Single wire system in which the chassis and engine block are used as conductors, grounded on the chassis. 11 If the battery must be replaced, replace it with one with the same cold start capacity - 2009 Volvo S40 | Owner's Manual - Page 273
(option) Glove compartment light Output 55W 21W 21W 24W 5W 5W 1.2W 5W 35W 3W Type H7 P21W PY21W P21/5W P21/W5 C5W Festoon W5W H8 Festoon 11 NOTE For information regarding any other bulbs not mentioned in this section, please contact your Volvo retailer or a trained and authorized Volvo service - 2009 Volvo S40 | Owner's Manual - Page 274
11 Specifications Three-way catalytic converter Three-way catalytic converter - general information NOTE Unleaded fuel is required for vehicles with three-way catalytic converters. • Keep your engine properly tuned. Certain engine malfunctions, particularly involving the electrical, fuel or - 2009 Volvo S40 | Owner's Manual - Page 275
in specific areas. Besides passing exams, each technician must also have worked in the field for two or more years before a certificate is issued. These professional technicians are best able to analyze vehicle problems and perform the necessary maintenance procedures to keep your Volvo at - 2009 Volvo S40 | Owner's Manual - Page 276
Battery maintenance...remote control, replacing...specifications...warning symbols...221 120 272 221 Battery - replacing...221 Bi-Xenon headlights...63 Black Box (Vehicle Event Data)...210 Blind Spot Information System (BLIS)...164 Booster cushion accessory...42 Brake fluid...219, 267 Brake lights - 2009 Volvo S40 | Owner's Manual - Page 277
seats...35 42 37 40 38 Coolant...267 changing...218 checking level of...218 Courtesy lighting...107 Crash mode...34 Cruise control...70 Cup holders...109, 111 Curb weight...183, 265 12 Child safety locks...129 C Capacities, fluids...267 Capacity weight...183, 265 Catalytic converter, three-way - 2009 Volvo S40 | Owner's Manual - Page 278
- conserving...138 Electrically operated moonroof...81 12 Engine oil...changing...checking...specifications...volumes... 216 216 216 269 267 manually operated...104 power...105 Fuel filler door unlocking...65 Fuel gauge...53 Fuel requirements...140 Fuel tank volume...267 Fuses, replacing...230 - 2009 Volvo S40 | Owner's Manual - Page 279
Bi-Xenon (option)...63 changing bulbs...223 high and low beams...66 high beam flash...66 Headlight washers...72 Head restraints, rear seat...113 High beam flash...66 High beams...66 Home safe lighting...66, 84 Hood, opening...214 Infant seats...38 Inflatable Curtain...30 Inflation pressure...176 - 2009 Volvo S40 | Owner's Manual - Page 280
Opening the hood...214 Opening the trunk from the inside...127 R Radio Sirius satellite radio...245 Radio functions...244 Rain sensor - windshield wipers...73 M Maintenance...210 performed by the owner...212 Manual climate control...95 12 Owner maintenance...212 P Panel lighting, instrument...64 - 2009 Volvo S40 | Owner's Manual - Page 281
...274 Tire inflation...176 Tire inflation pressure Canadian models...179 US models...178 Tire Pressure Monitoring System (TPMS) 197 Tires...age...changing...changing from summer to winter...designations...glossary of terms...improving economy...inflation...inflation pressure, checking...174 - 2009 Volvo S40 | Owner's Manual - Page 282
towing...160 Transmission Geartronic...150 manual...147, 148 shiftlock override...151 Tread wear indicator...175 Treble...242 Trip computer...68 Trips, long distance...138 Trunk opening from the inside...127 Turn signals...66 indicator lights...53 Vehicle maintenance performed by the owner...212 - 2009 Volvo S40 | Owner's Manual - Page 283
12 Index Windows power...76 Windshield washer fluid reservoir...215 Windshield wiper blades...220 Windshield wipers...72 rains sensor...73 Winter tires...186 Wiper blades replacing windshield wipers...220 12 283 - 2009 Volvo S40 | Owner's Manual - Page 284
12 Index 12 284 - 2009 Volvo S40 | Owner's Manual - Page 285
- 2009 Volvo S40 | Owner's Manual - Page 286
-
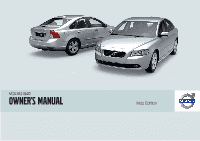 1
1 -
 2
2 -
 3
3 -
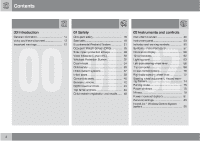 4
4 -
 5
5 -
 6
6 -
 7
7 -
8
-
9
-
10
-
11
-
12
-
13
-
14
-
15
-
16
-
17
-
18
-
19
-
20
-
21
-
22
-
23
-
24
-
25
-
26
-
27
-
28
-
29
-
30
-
31
-
32
-
33
-
34
-
35
-
36
-
37
-
38
-
39
-
40
-
41
-
42
-
43
-
44
-
45
-
46
-
47
-
48
-
49
-
50
-
51
-
52
-
53
-
54
-
55
-
56
-
57
-
58
-
59
-
60
-
61
-
62
-
63
-
64
-
65
-
66
-
67
-
68
-
69
-
70
-
71
-
72
-
73
-
74
-
75
-
76
-
77
-
78
-
79
-
80
-
81
-
82
-
83
-
84
-
85
-
86
-
87
-
88
-
89
-
90
-
91
-
92
-
93
-
94
-
95
-
96
-
97
-
98
-
99
-
100
-
101
-
102
-
103
-
104
-
105
-
106
-
107
-
108
-
109
-
110
-
111
-
112
-
113
-
114
-
115
-
116
-
117
-
118
-
119
-
120
-
121
-
122
-
123
-
124
-
125
-
126
-
127
-
128
-
129
-
130
-
131
-
132
-
133
-
134
-
135
-
136
-
137
-
138
-
139
-
140
-
141
-
142
-
143
-
144
-
145
-
146
-
147
-
148
-
149
-
150
-
151
-
152
-
153
-
154
-
155
-
156
-
157
-
158
-
159
-
160
-
161
-
162
-
163
-
164
-
165
-
166
-
167
-
168
-
169
-
170
-
171
-
172
-
173
-
174
-
175
-
176
-
177
-
178
-
179
-
180
-
181
-
182
-
183
-
184
-
185
-
186
-
187
-
188
-
189
-
190
-
191
-
192
-
193
-
194
-
195
-
196
-
197
-
198
-
199
-
200
-
201
-
202
-
203
-
204
-
205
-
206
-
207
-
208
-
209
-
210
-
211
-
212
-
213
-
214
-
215
-
216
-
217
-
218
-
219
-
220
-
221
-
222
-
223
-
224
-
225
-
226
-
227
-
228
-
229
-
230
-
231
-
232
-
233
-
234
-
235
-
236
-
237
-
238
-
239
-
240
-
241
-
242
-
243
-
244
-
245
-
246
-
247
-
248
-
249
-
250
-
251
-
252
-
253
-
254
-
255
-
256
-
257
-
258
-
259
-
260
-
261
-
262
-
263
-
264
-
265
-
266
-
267
-
268
-
269
-
270
-
271
-
272
-
273
-
274
-
275
-
276
-
277
-
278
-
279
-
280
-
281
-
282
-
283
-
284
-
285
-
286
 |
 |
VOLVO S40
Owner's manual
Web Edition